
Document Snapshots
Snapshots preserve history at the document level; backups preserve data at the Library level. Use a snapshot to view or restore one document’s content at a particular moment. Use a backup to save and restore an entire Library.
Before a major rewrite, save a snapshot so you can compare changes or recover an earlier draft. Whiteboards and cards also support their own snapshots. To review individual edits as they happened, use Writing Replay.
Save and View
Open a document, whiteboard, or card and switch to the Snapshot sidebar panel. In a Cloud Library, first select Local at the top of the panel. Click New Snapshot to save a local version of the current content. If it matches the previous snapshot, WonderPen does not create a duplicate.
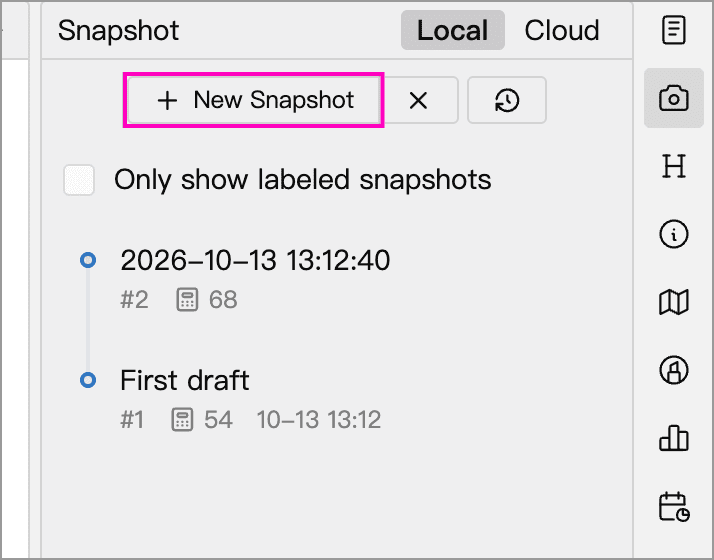
On a whiteboard, selecting a single card shows that card’s snapshots. Deselect the card to view snapshots of the whiteboard itself.
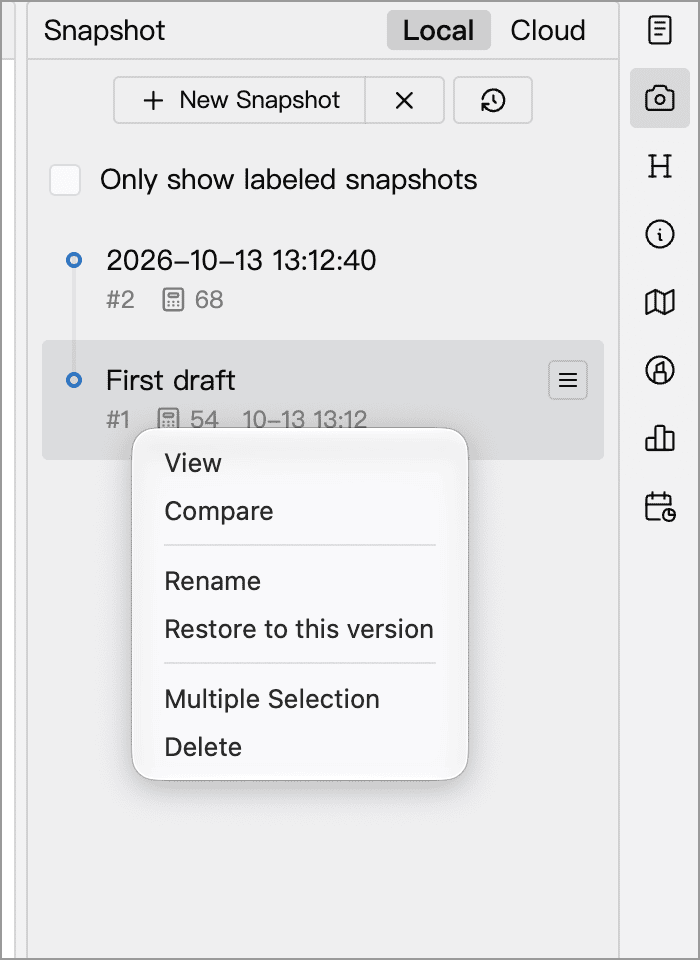
Right-click a snapshot to view, restore, rename, or delete it. Document snapshots can also be compared with the current text.
Compare and Restore
Choose Versions to View or Compare
Choose View from a document snapshot’s context menu to see it with its original formatting. Click Compare at the top of the window to add the current document as a second version. You can also choose Compare directly from the snapshot’s context menu.
The versions being viewed appear at the top of the window. Click a version block, then choose a snapshot or Current Content from the list on the right to replace that version. The selected block has a blue border. The other version is marked Comparing in the list and cannot be selected twice. Close either version block to return to viewing a single version.
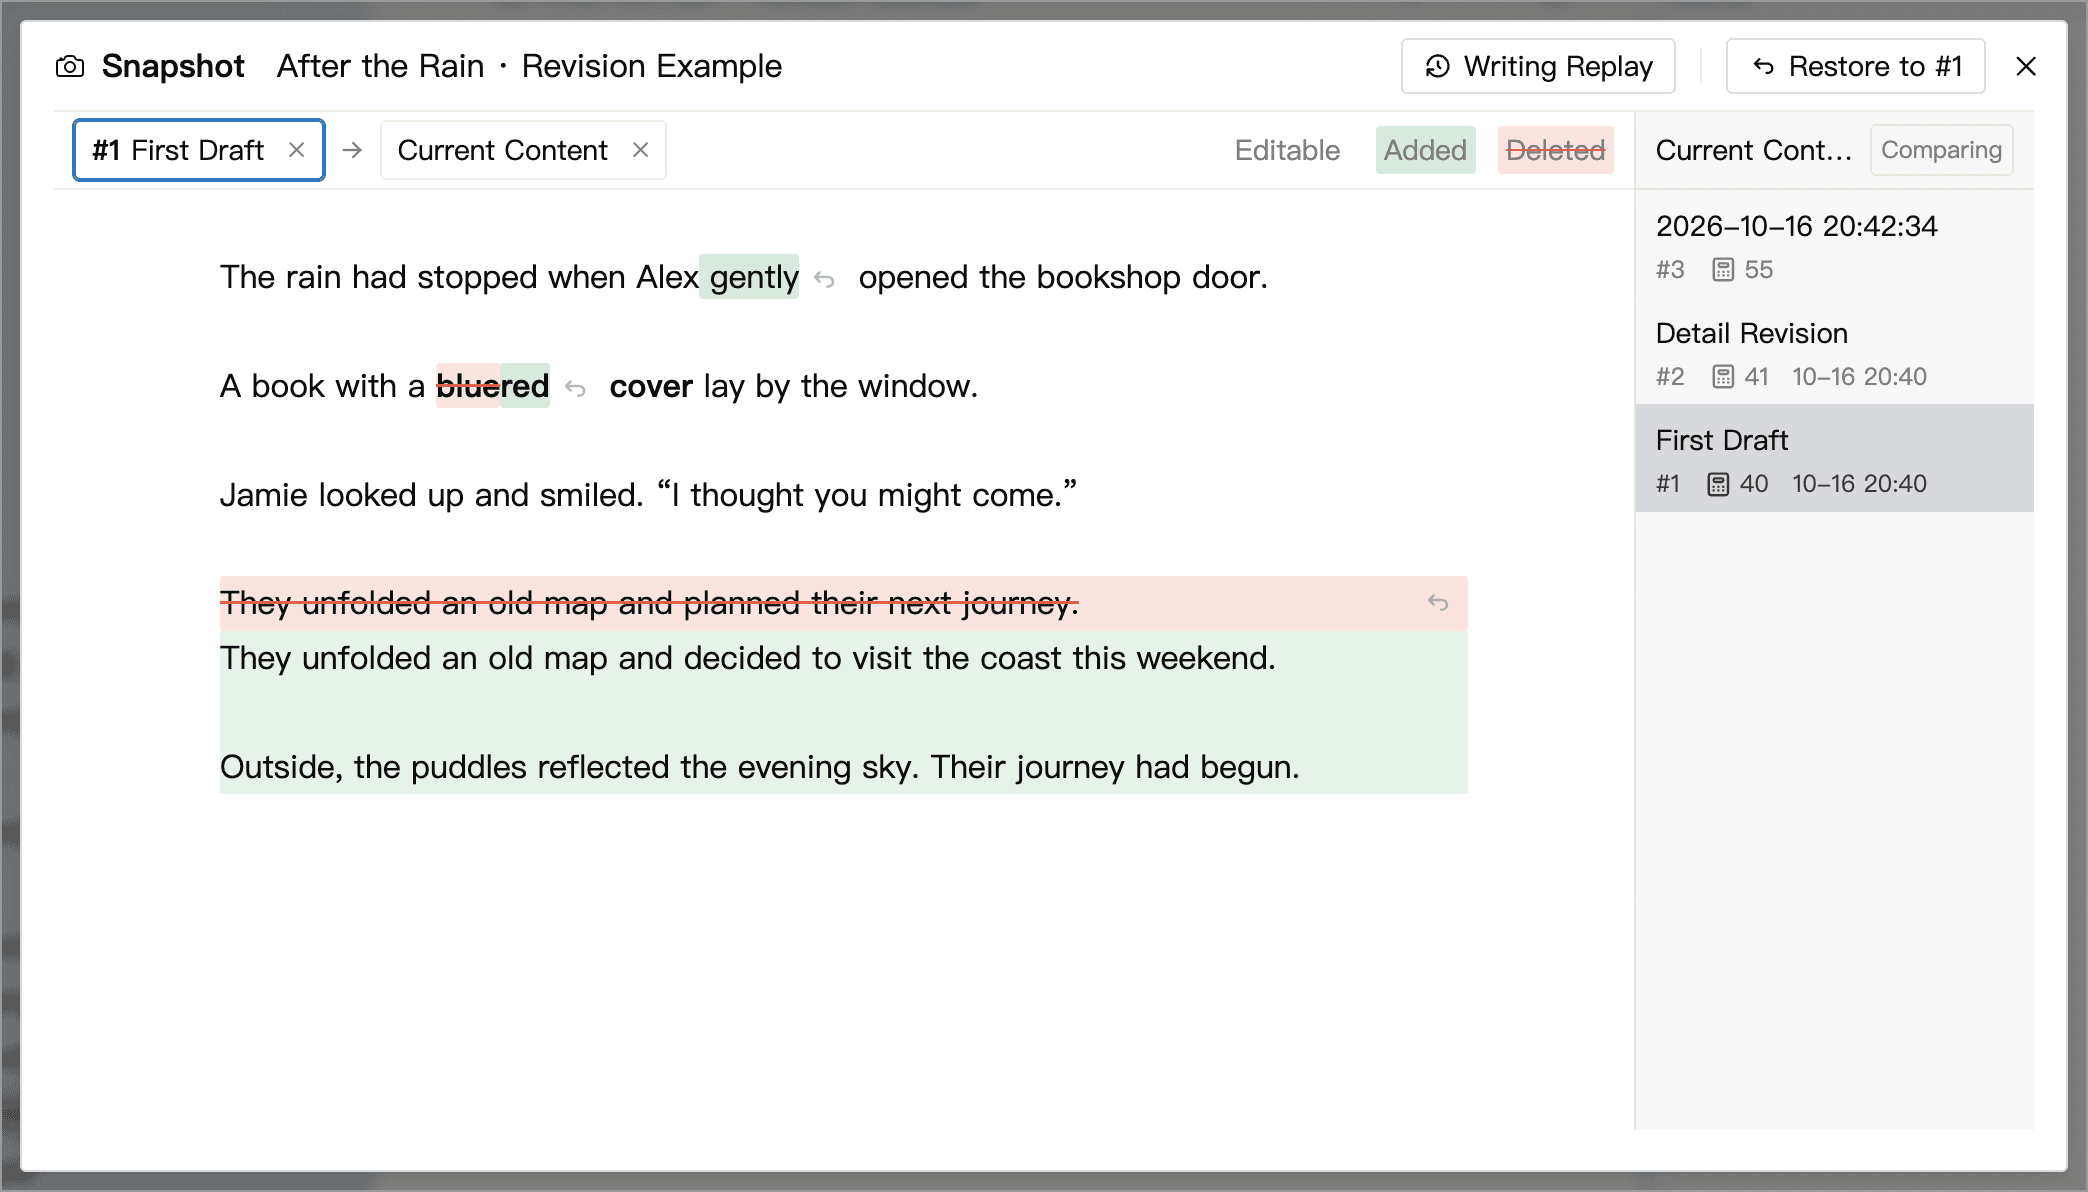
You can compare two historical snapshots as well as a snapshot and the current document. WonderPen uses the earlier version as the reference and displays changes within the later version. Current Content is always treated as the latest version. The arrow at the top points from the earlier version to the later one.
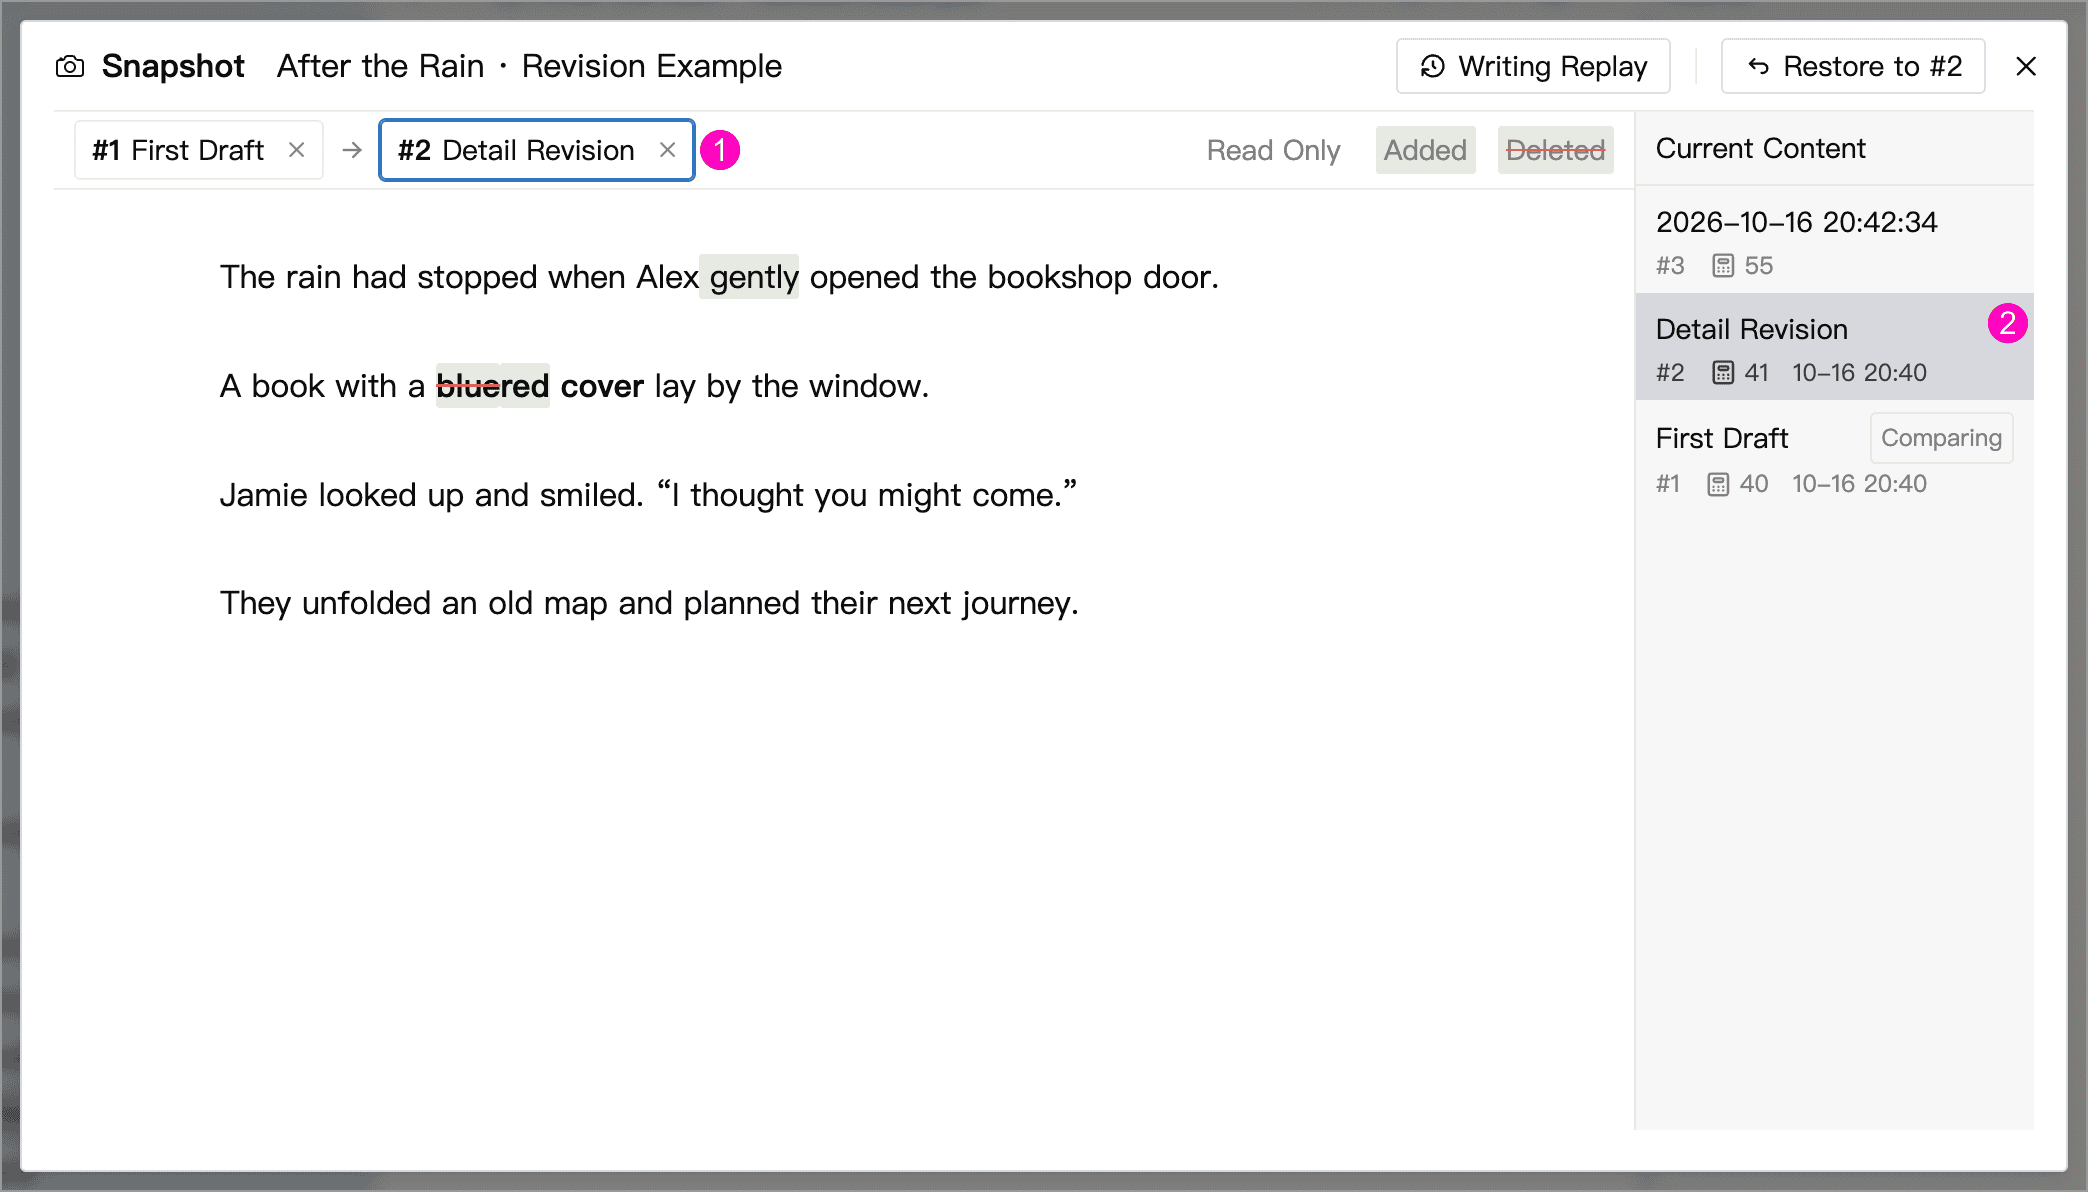
The version list shows snapshot names or timestamps, numbers, and word counts. Counts follow your current counting method; hover to see the other methods. Snapshots without word-count information show their file size instead.
Review Differences and Restore Individual Changes
Added and Deleted content is marked inline; use the legend at the top to identify each. Comparisons also include images, tables, formulas, footnotes, and formatting changes.
When the comparison includes Current Content, the document area is Editable. Edit the current text directly, or click Revert This Change beside a difference to restore that part from the earlier snapshot. These actions change the current document while leaving historical snapshots unchanged. Some table structure changes require restoring the entire table, so review the affected content first.

Comparisons between two historical snapshots are Read Only: you cannot edit them or revert individual changes. To use historical content in your current draft, compare it with Current Content, or copy the passages you need and edit them manually.
Restore an Entire Version
For a document, select the snapshot’s version block at the top, then click Restore to #number and confirm to replace the current text with that snapshot. The restore button is hidden when Current Content is selected. Whiteboards and cards have no version blocks at the top: select a snapshot in the list on the right, then click Restore to this version. You can also choose Restore to this version from a snapshot’s sidebar context menu.
Save a snapshot of the current content first if you want to keep it. What gets restored depends on the item:
| Item | Restored content |
|---|---|
| Document | Body text; the current title and memo are retained |
| Whiteboard | Whiteboard content; the current board name and memo are retained |
| Card | Card content, including its title; the current memo is retained |
Whiteboards and cards support viewing and restoring snapshots, but do not offer document difference comparisons. In a Cloud Library, restored content synchronizes as an edit.
Named Snapshots
Right-click a snapshot and choose Rename. Names such as “First draft” or “Submission version” make important versions easier to find. Select Only show labeled snapshots in the panel to filter important versions.
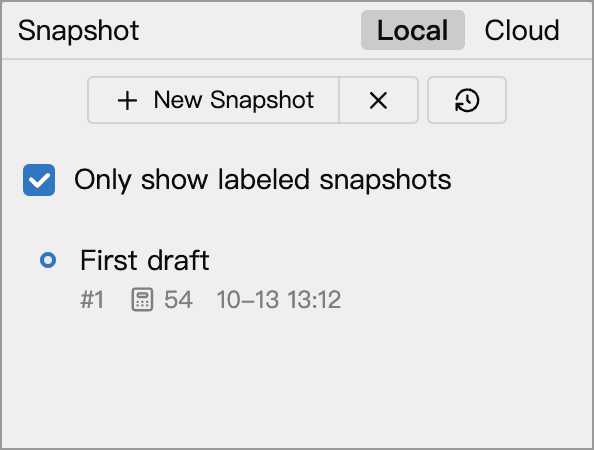
When clearing local snapshots in Settings, Include labeled snapshots is unchecked by default, so named snapshots are retained. If you check it, named snapshots are included in the selected range. Age-based cleanup still preserves unresolved conflict snapshots.
To remove a named snapshot you no longer need, right-click it in the Snapshot panel and choose Delete.
Automatic Snapshots and Backups
Open Settings → Advanced → Snapshot to adjust automatic snapshots and backup options.
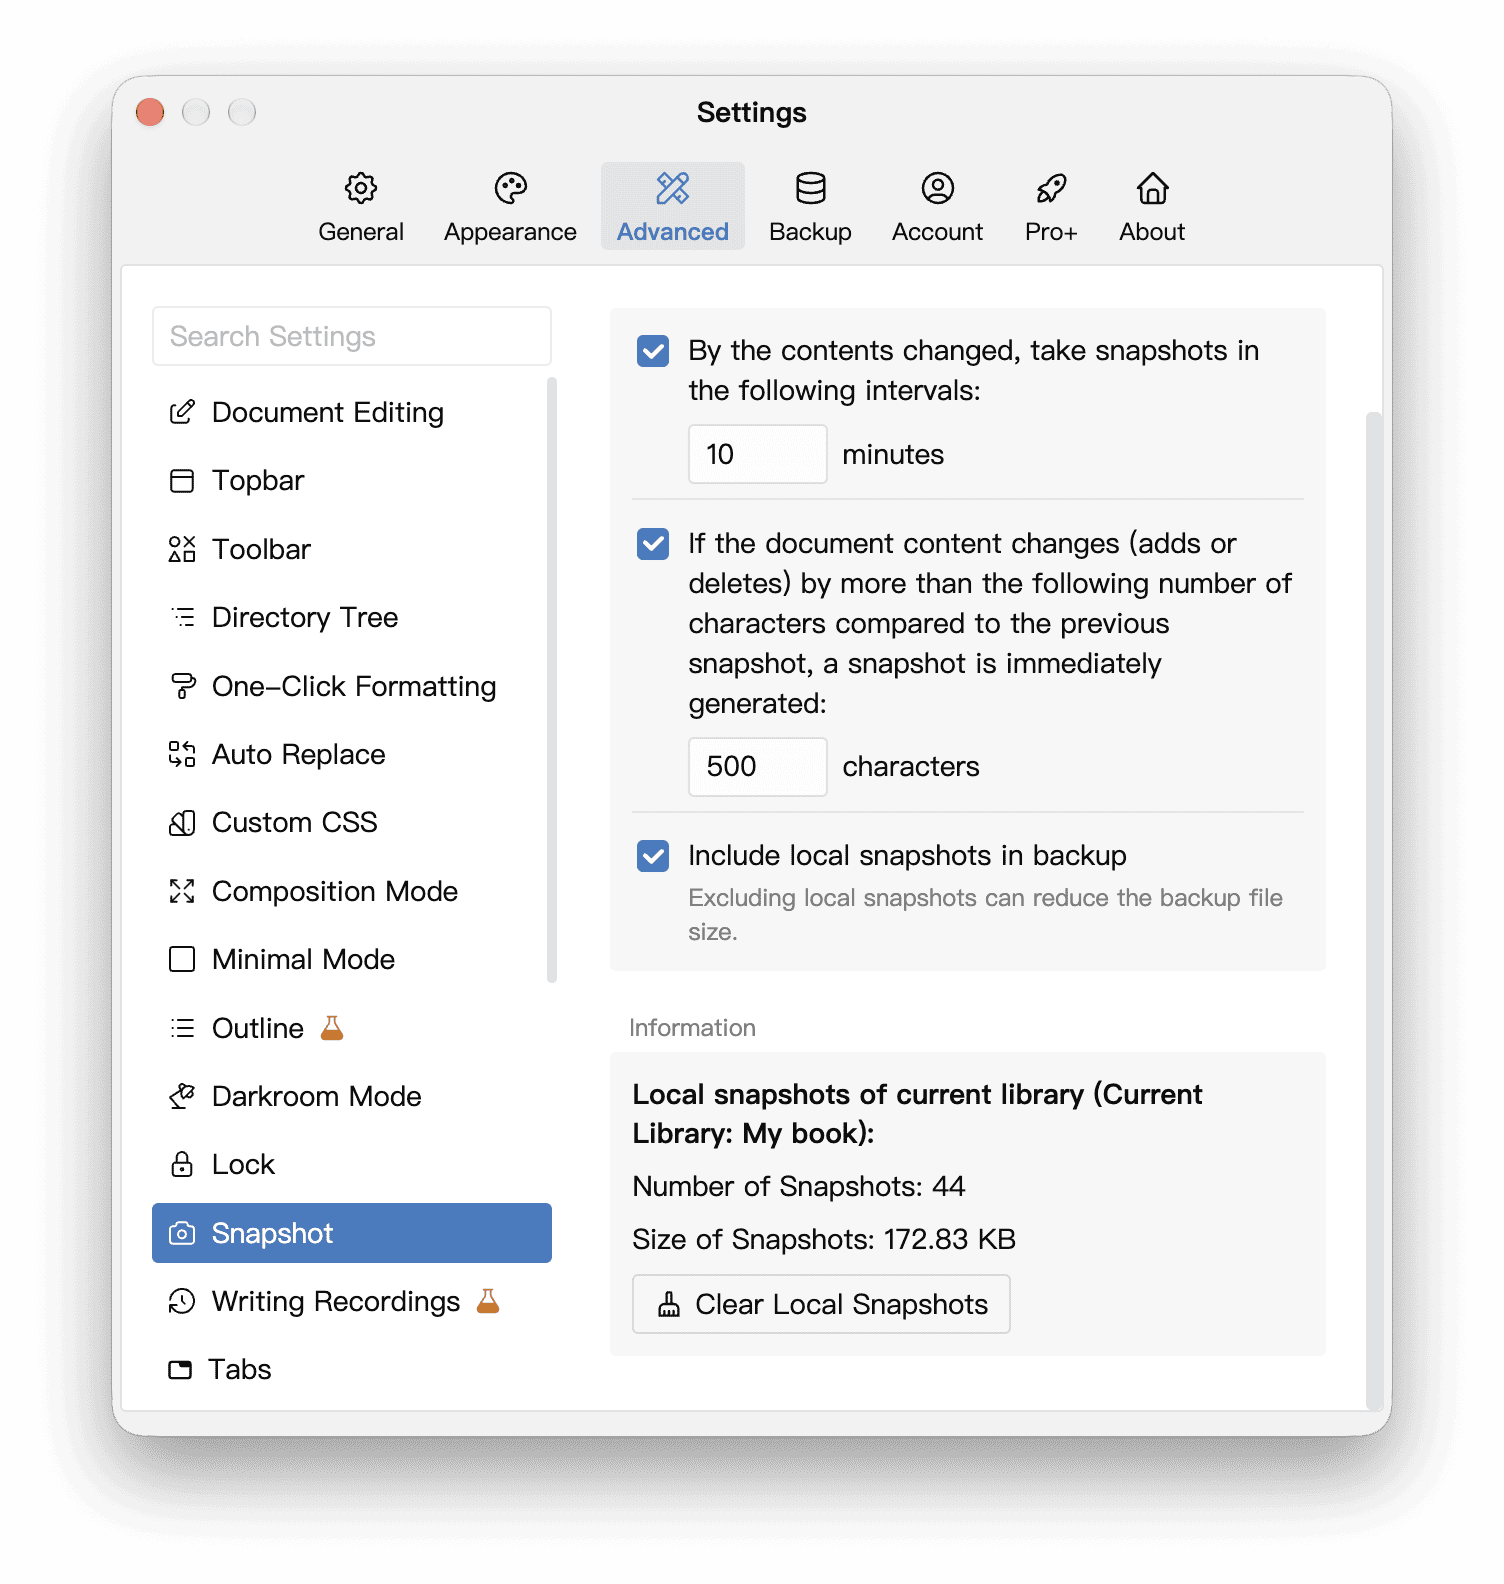
- Timed snapshots: check for changed content at the selected interval and save a snapshot after editing pauses, without duplicating unchanged content.
- Character-count changes: when enabled, immediately save the previous version when the change in document character count reaches the configured threshold relative to the last saved text. It does not count cumulative typing, and its switch is independent of timed snapshots.
- Include local snapshots in backup: include snapshots stored on this device in Zip backups. Turning it off reduces backup size but excludes those historical versions.
For example, if you accidentally delete a large passage and the change reaches the threshold, WonderPen immediately saves the version before deletion so you can recover the missing text from the snapshot. Pasting a large amount of text can also trigger this.
Automatic snapshots do not replace deliberate saves at important milestones. Save and name a snapshot before a major rewrite so that you can find it easily later.
Clean Up Local Snapshots
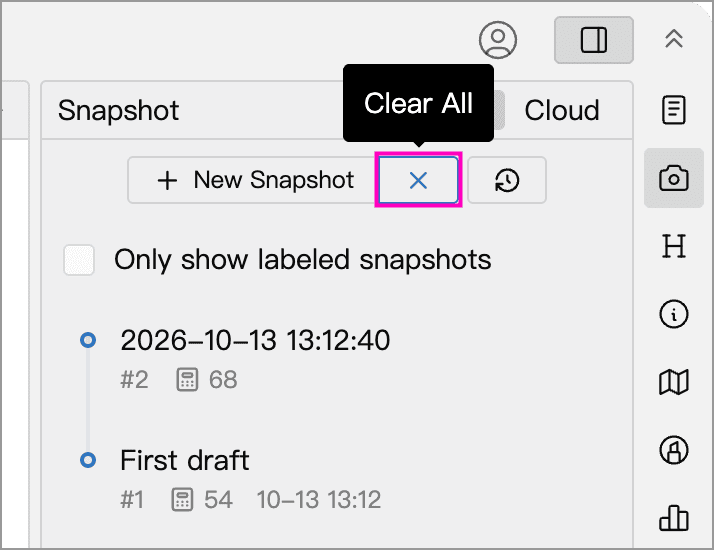
Delete an individual snapshot from its context menu, or choose Multiple Selection, select the snapshots, and click Delete. On the Local tab, Clear All removes every local snapshot for the current item, including named snapshots. The Only show labeled snapshots filter does not limit what gets cleared.
To clean up an entire Library, open that Library, then go to Settings → Advanced → Snapshot and click Clear Local Snapshots. Choose snapshots older than one year, 90 days, or 30 days to keep unresolved conflict snapshots. Clearing all local snapshots includes conflict snapshots and requires a second confirmation. In either case, named snapshots are retained unless you select Include labeled snapshots.
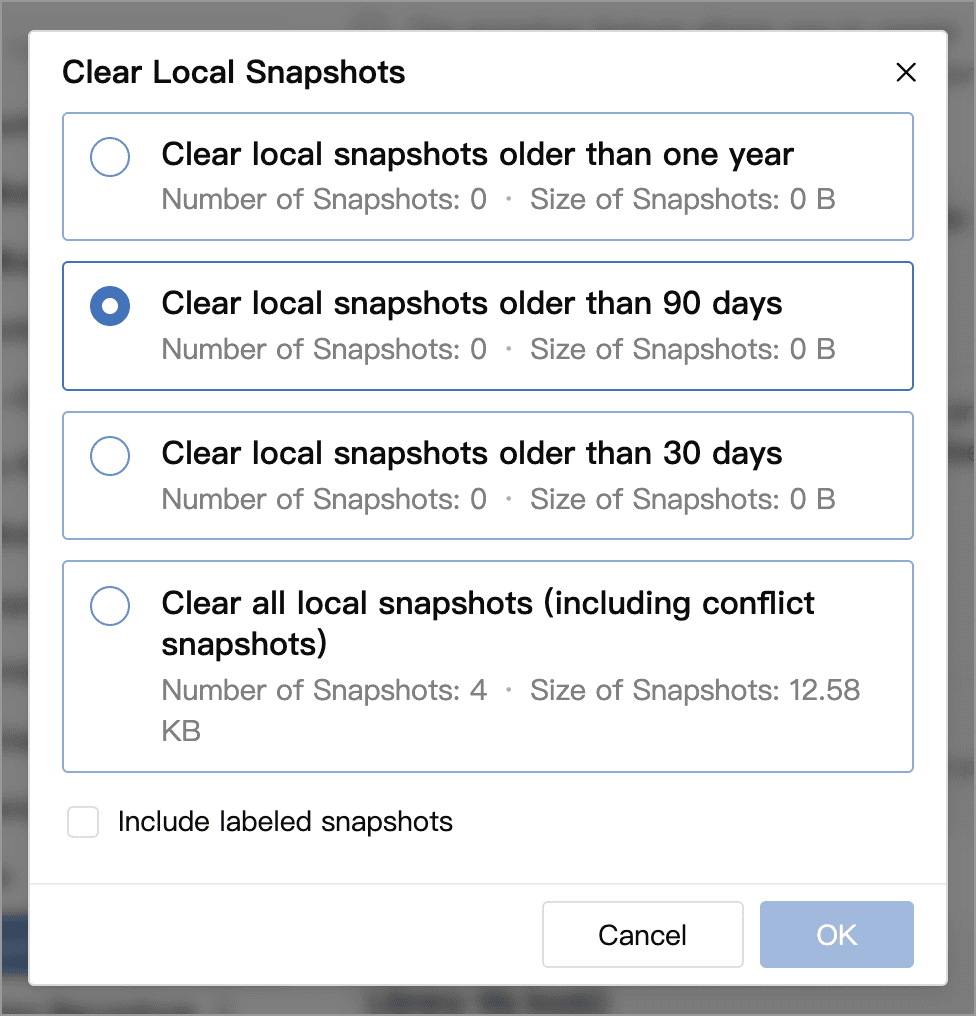
Cleanup does not change the current text or remove cloud snapshots. Deleting local snapshots cannot be undone, and they do not go to the Trashcan. If you need those versions, first verify that a backup includes them.
Cloud Snapshots
Cloud Libraries also provide snapshots generated by the server. Switch between Local and Cloud at the top of the panel.
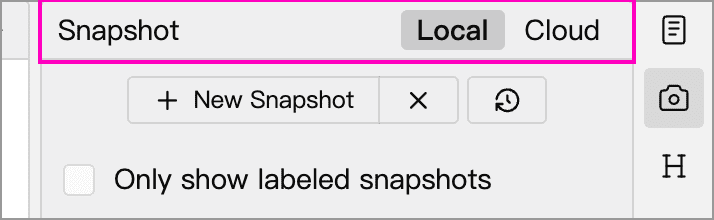
Cloud snapshots can be viewed and restored on different devices and require a connection to retrieve. The server creates cloud snapshots for changed content according to its own rules. Local snapshot intervals and local cleanup settings do not change those rules.
Clicking New Snapshot manually creates a local snapshot; it is not uploaded as a cloud snapshot. To preserve those versions stored on this device, enable Include local snapshots in backup and save a backup.
See the plan comparison and the app for current retention periods and availability. Keep separate local backups or exports of versions you need to retain long term.